If you want to provide secure graphical Linux desktops for multiple remote users, Cendio ThinLinc is one of the best open-source VDI (Virtual Desktop Infrastructure) platforms available. It combines a lightweight design, multi-user capability, and web-based access—making it ideal for developers, students, and businesses.
In this step-by-step guide, you’ll learn how to deploy a complete ThinLinc VDI solution on Google Cloud Platform (GCP) using Ubuntu 24.04 LTS.
Step 1 - Open the Google Cloud Console
Sign in at https://console.cloud.google.com and select your project. Then, go to Compute Engine => VM Instances

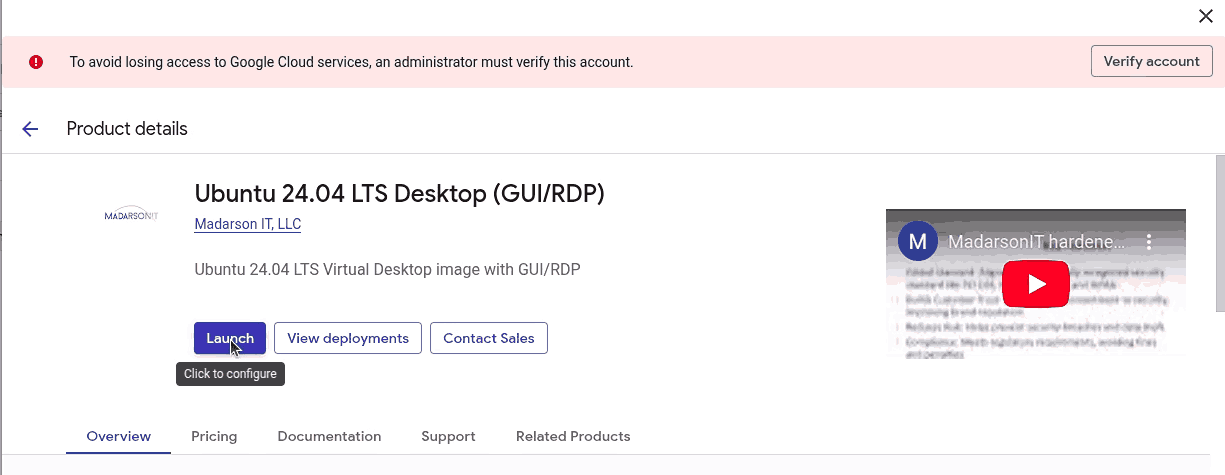
Step 2 - Search for an Ubuntu Desktop Image
In the left pane, open the Marketplace, then search for “Ubuntu Desktop”

Select Ubuntu 24.04 LTS Desktop (GUI/RDP) published by Madarson IT LLC. This image already includes a pre-configured GUI—ideal for ThinLinc.
Step 3 - Launch the Image
Click Launch to start the VM configuration wizard.
Step 4 - Configure VM Settings

Fill in the required details:
-
Deployment name: ubuntu2404-7
-
Service account: Use the existing default account (compute.admin, serviceAccountUser)
-
Zone: us-central1-c
-
Machine type: n1-standard-2 (2 vCPUs, 7.5 GB RAM)
Step 5 - Configure Disk and Network

Check and adjust the following:
-
Boot disk type: Balanced Persistent Disk
-
Boot disk size: 10 GB
-
API access: Enable Allow full access to all Google Cloud Platform APIs
Then, click Deploy.
Step 6 - Wait for Deployment to Complete
Once deployment finishes, the status changes to Created.

Click your VM resource (e.g., ubuntu2404-7-vm).
Step 7 - Connect to the VM
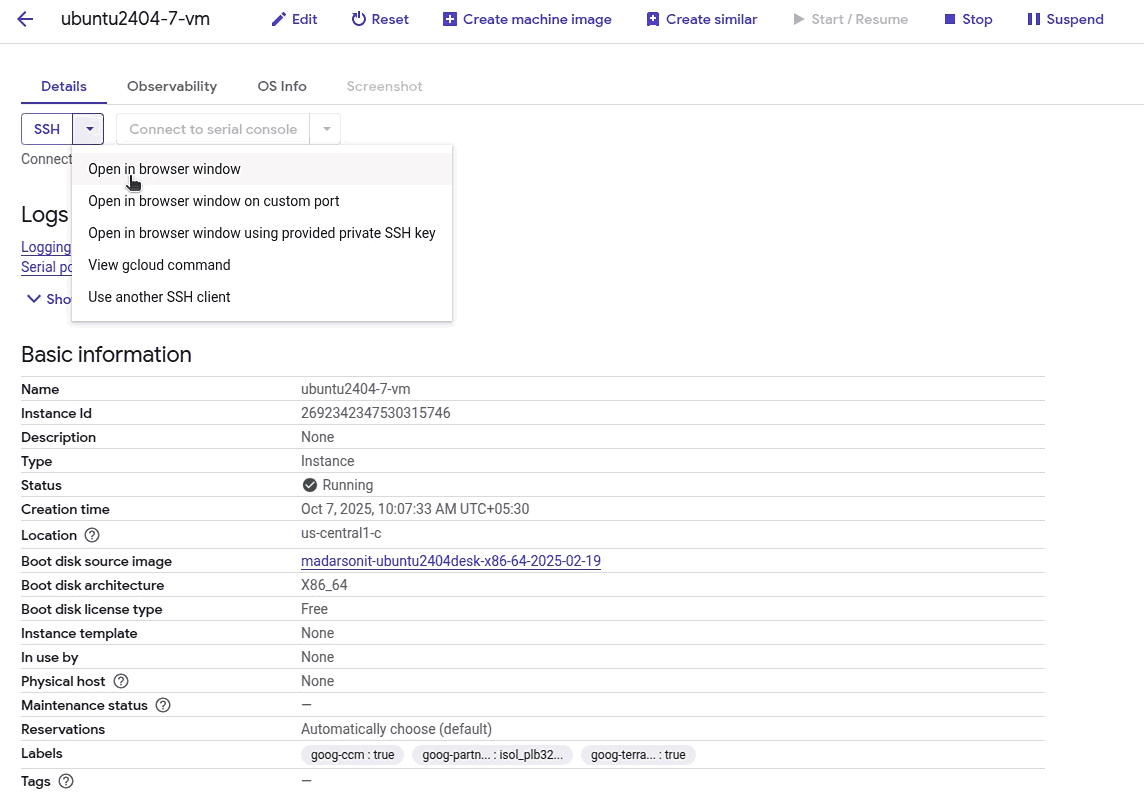
From the instance details page, open the SSH drop-down menu and choose Open in browser window.
Step 8 - Verify Ubuntu Environment and Prepare the ThinLinc User

When the SSH terminal opens, you’ll see a prompt like:
Welcome to Ubuntu 24.04.2 LTS (GNU/Linux 6.8.0-1021-gcp x86_64)
htjethva7@ubuntu2404-7-vm:~$
Switch to the root user.
sudo su
Create a new administrative user who will later log in to ThinLinc.
adduser john
Add a user to the sudo group.
usermod -aG sudo john
Add ThinLinc paths to the sudoers file.
nano /etc/sudoers
Append this line under the existing Defaults entries.
Defaults secure_path="/usr/local/sbin:/usr/local/bin:/usr/sbin:/usr/bin:/sbin:/bin:/snap/bin:/opt/thinlinc/bin:/opt/thinlinc/sbin"
Save the file and exit.
Your system is now prepared with a user and environment ready for ThinLinc.
Step 9 - Generate SSH Keys Locally
On your local machine, create an SSH key pair.
ssh-keygen -t rsa -b 4096 -f ~/.ssh/john_gcp_key -C "john"
Just press the Enter key when prompted for a passphrase:
Generating public/private rsa key pair.
Enter passphrase (empty for no passphrase):
Enter same passphrase again:
Your identification has been saved in /home/vyom/.ssh/john_gcp_key
Your public key has been saved in /home/vyom/.ssh/john_gcp_key.pub
The key fingerprint is:
SHA256:NZqyfts50HlQLi9IuTCR77SyjevGqBdokiXuYGAWXAk john
The key's randomart image is:
+---[RSA 4096]----+
|.Eo..  .         |
| o .  o     .    |
|  .    o .oo     |
|oo.   o =+o..    |
|=+ .  .*S= =     |
|+oo . .o* + o    |
|+o   +.= . o     |
| .  o.= o...     |
|  .o o+o..o.     |
+----[SHA256]-----+
See the content of the public key.
cat ~/.ssh/john_gcp_key.pub
Output.
ssh-rsa AAAAB3NzaC1yc2EAAAADAQABAAACAQCzgmOasmMzgtvwrSFO5BOCzFOKs7Vk5ucVbJJ1L9RCHicpOi6OlsydkRvpETUenf+H63tyi9WjUtQmFeqYZCIDzskaFpaTbV65LkXUPUcTdHKWldLb4B1O51YvpMqKXUSb3WBgsRMMx+//DT0maaAdtWJPrJY4O4QJT+m391b5WX6x5WLELP1XamYScpVT/kaQ0El3EbPfgO5xF2YACbrxst7Fajy0RzNkECZbjrnE0+mfwv040DhzCH5qJJ8BgOJNleQVZgru2eT4HIjlHlatmTZ97uQvaHZf3iiqZ5M73s9lIwG+gKJ9/JvwXV+LUoKkeBYe6Ow+eSOHT1ZmliKfa7637jX23eTJh1q0ZVWH3ryg4QmiFk2arQTY4XUXDFlA2r1jJm709zo0Z54a057wgKjT07FyZHzrusGjDdqM4vxhgoypypU+KvYM4Z49yi7lo+69uO/16e7LmOg2PoVTp1HM0ZvicO3liS2nd8wVP4iKyAHnzAPkERjBoQEV7MIvJ/F3t5QbGumEhB7QLpZ73y3vfgLq4TB2wjYfbSoDPIrXn5fy5HXiQBQQ9uUZVD7jniLIzsfqctVcnn37c9av3JSkgW7ZJ5tw7BQ5Ex/EmGVXeq9VHjCURiRMrEuNIMjNE8DV8YeKs+E1Kl49BWYCANOLFLfYtksrPWpJPGTkcQ== john
Step 10 - Add SSH Keys to the VM
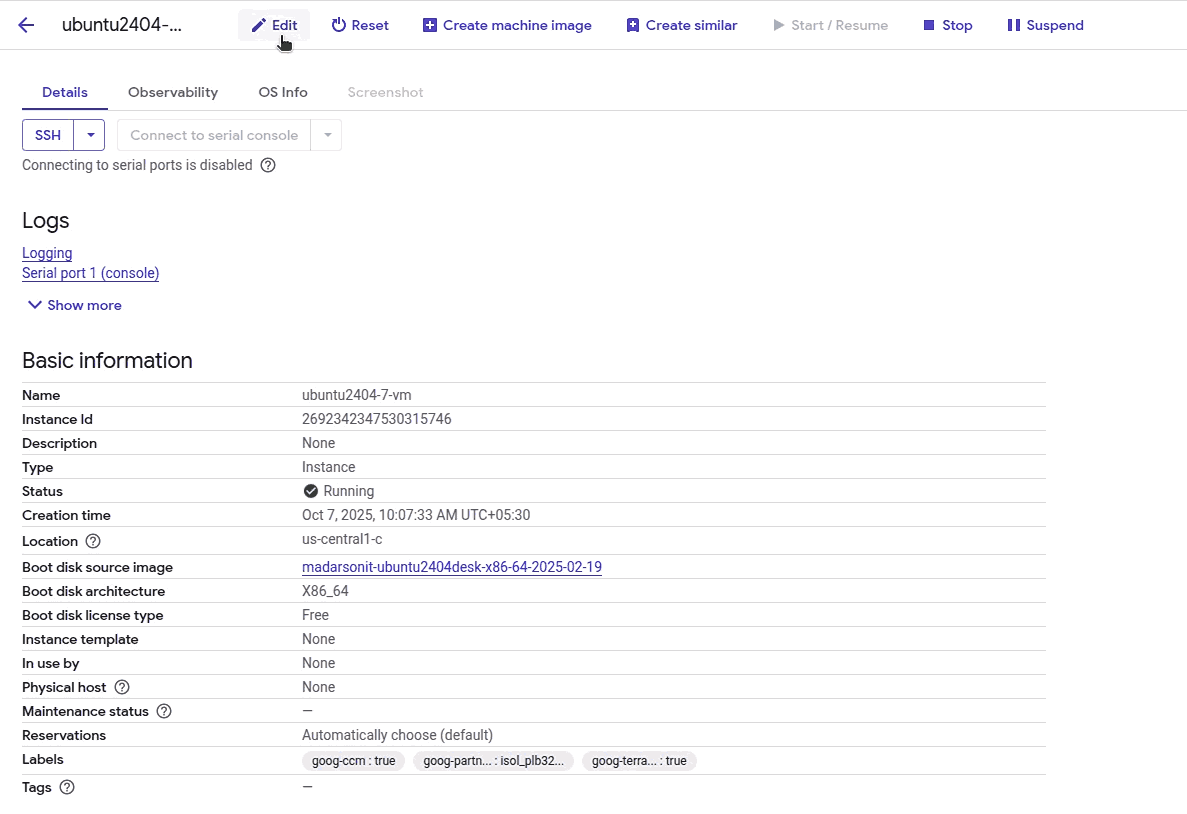
Back in the Google Cloud Console, open your VM’s => Click Edit.
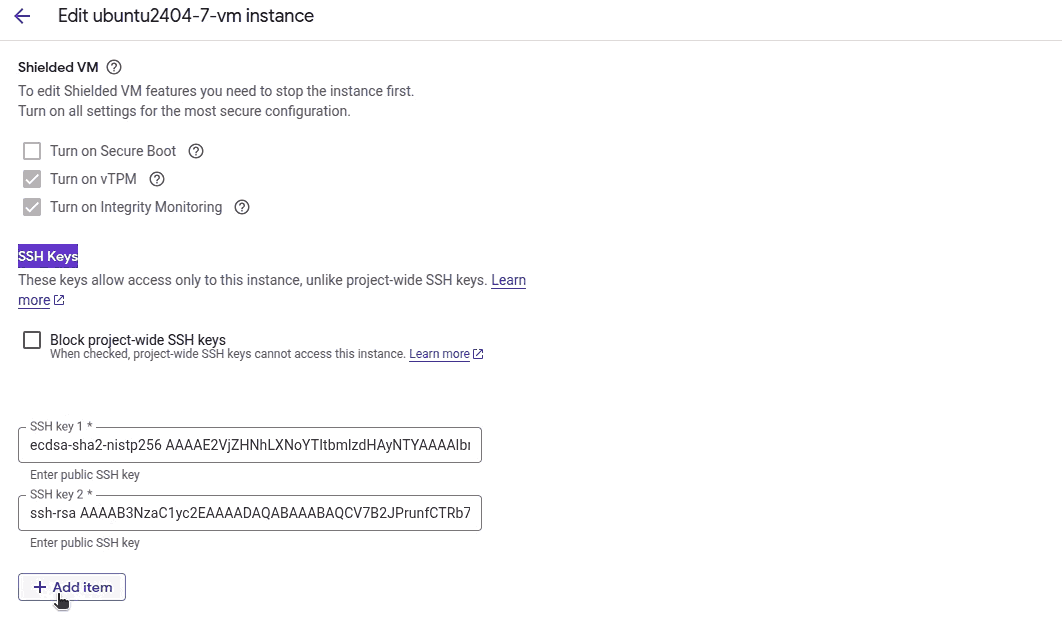
Scroll to SSH Keys => click Add item.

Paste your SSH public key and click Save.
Step 11 - Connect to the Instance and Install ThinLinc Server
On your local machine, open a terminal and connect to your VM externally using your SSH key.
ssh -i ~/.ssh/john_gcp_key john@your-instance-ip
Once connected, download and install ThinLinc.
wget https://www.cendio.com/downloads/server/tl-4.19.0-server.zip
unzip tl-4.19.0-server.zip
cd tl-4.19.0-server
sudo ./install-server
The installation wizard will start in text mode.
Could not start GTK+. Using text mode fallback...

ThinLinc server installation
============================

This program will help you install the ThinLinc software on your system.
Press Enter to continue...
Press Enter to continue. The installer will list the packages to be installed.
Determining packages to install... done.

The following packages will be installed:

	 thinlinc-server_4.19.0-4116_amd64.deb

Press Enter to continue..
Press Enter again to start installing the package.
Performing package installation... done.

All packages were installed successfully.

Press Enter to continue...

Installation of ThinLinc completed

Before using ThinLinc, you must configure it using
/opt/thinlinc/sbin/tl-setup.
Type Yes and press Enter to launch the configuration wizard.
Run ThinLinc setup now [Yes/no]? Yes
You must accept the license to continue.
Do you accept the terms of the license agreement [yes/No]? yes
Choose Master as this will be the main server that users connect to.
Server type
===========

Select the type of ThinLinc server to configure.

The master server is the one users will connect to. Agent servers are
used to spread the resource load when just the master server is
insufficent. If unsure, then pick Master.

Server type [Master/agent]? Master
The wizard will verify required libraries and binaries. Press Enter to continue and allow auto-installation of missing packages.
System check
============

Analyzing system... done.

Library and binary requirements
===============================

ThinLinc requires certain libraries and binaries to work as expected.
This system lacks one or more of these.

The necessary packages can be installed automatically by this wizard, or
you can install them manually and restart the wizard.

Press Enter to continue...
The local drive redirection feature requires NFS client support. Type Yes to auto-install the packages.
Network file system support
===========================

The local drive redirection feature requires that your system can act as
an NFS client.

The necessary packages can be installed automatically by this wizard, or
you can install them manually and restart the wizard.

Automatically install the necessary packages [Yes/no]? Yes
ThinLinc requires GTK+, PyGObject, and the Python LDAP module. Type Yes when prompted to install them automatically.
GTK+ dependency
===============

Some parts of ThinLinc require GTK+ and PyGObject to function correctly.
Your system does not have these installed.

The necessary packages can be installed automatically by this wizard, or
you can install them manually and restart the wizard.

Automatically install the necessary packages [Yes/no]? Yes


Python dependency
=================

The Python LDAP module is required for LDAP integration tools. Your
system does not have this installed.

The necessary packages can be installed automatically by this wizard, or
you can install them manually and restart the wizard.

Automatically install the necessary packages [Yes/no]? Yes
Set the externally reachable address for ThinLinc. In this case, use the manual.
External connections
====================

ThinLinc may not be externally accessible

Externally reachable address to use

 * IP address
 * Hostname (vultr.guest)
 * Manually specified

Externally reachable address to use [ip/hostname/manual]? manual
Externally reachable agent hostname []? your-instance-ip
Enter your email address to receive administrative alerts.
Administrator contact
=====================

ThinLinc will send administrative messages, for example license
warnings, to this email address.

Administrator email []? hitjethva@gmail.com
The ThinLinc Web Administration runs on port 1010. The default username is admin. Enter your desired password.
Web Administration
==================

The default Web Administration username is "admin". Enter the desired
password for this user, or leave unchanged to skip this step.

The ThinLinc Web Administration is running on port 1010 (https) on this
server.

Web Administration password?
ThinLinc requires AppArmor configuration for security. Type Yes to install it.
AppArmor
========

This system is using the AppArmor access control system. A ThinLinc
configuration needs to be loaded for some applications to operate
correctly in this environment. Would you like to install the ThinLinc
AppArmor configuration?

Install AppArmor configuration [Yes/no]? Yes
The wizard will configure and start all services automatically.
Configuring services and timers
===============================

Configuring and starting ThinLinc services and timers... done.

All ThinLinc services and timers have been configured and started
successfully.

Press Enter to continue...
Press Enter to complete the installation.
ThinLinc has been setup
=======================

The ThinLinc Web Administration is available at https://localhost:1010,
and the configuration files are located in /opt/thinlinc/etc/conf.d/.
Icons for the ThinLinc Web Access, ThinLinc Web Administration and
ThinLinc setup have been added to the menu.

Visit https://www.cendio.com/thinlinc/support for information on how to
contact us.

Press Enter to continue...
Step 12 - Verify ThinLinc Services
Check that all components are running.
sudo systemctl status vsmserver vsmagent tlwebaccess tlwebadm
You should see all services listed as active (running).
Step 13 - Open Required Firewall Ports
Allow ThinLinc web and admin access by creating three firewall rules.
gcloud compute firewall-rules create allow-thinlinc-web \
  --allow=tcp:300 \
  --source-ranges=0.0.0.0/0 \
  --description="Allow ThinLinc Web Access (port 300)"
gcloud compute firewall-rules create allow-thinlinc-panel \
  --allow=tcp:1010 \
  --source-ranges=0.0.0.0/0 \
  --description="Allow ThinLinc Admin Panel (port 1010)"
gcloud compute firewall-rules create allow-thinlinc-vsm \
  --allow=tcp:9000 \
  --source-ranges=0.0.0.0/0 \
  --description="Allow ThinLinc VSM Server (port 9000)"
Reboot the VM.
sudo reboot
Step 14 - Access ThinLinc Web Interface
After reboot, open your browser and visit https://your-instance-ip:300.
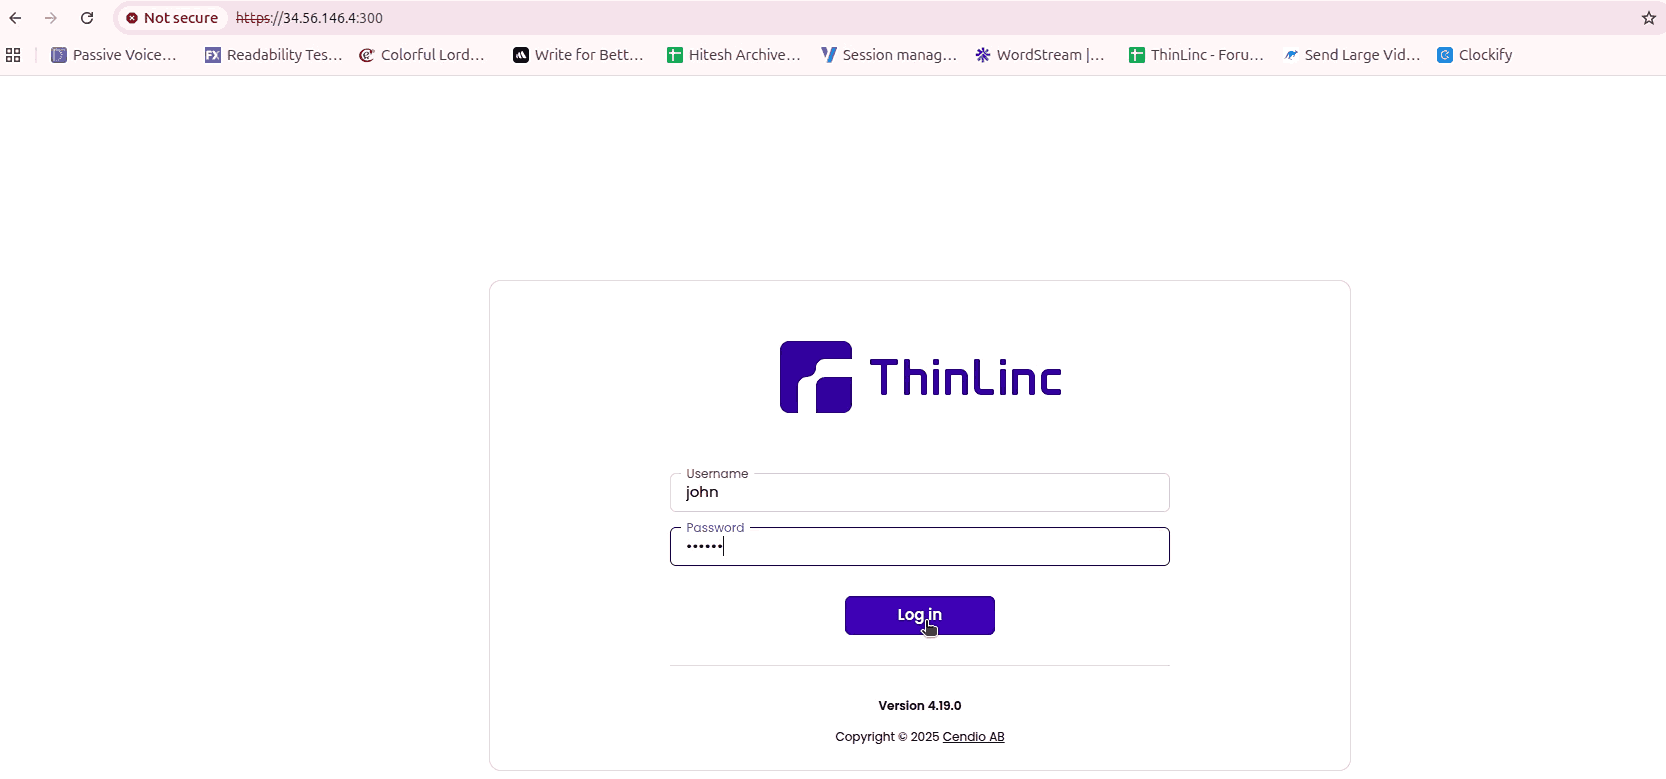
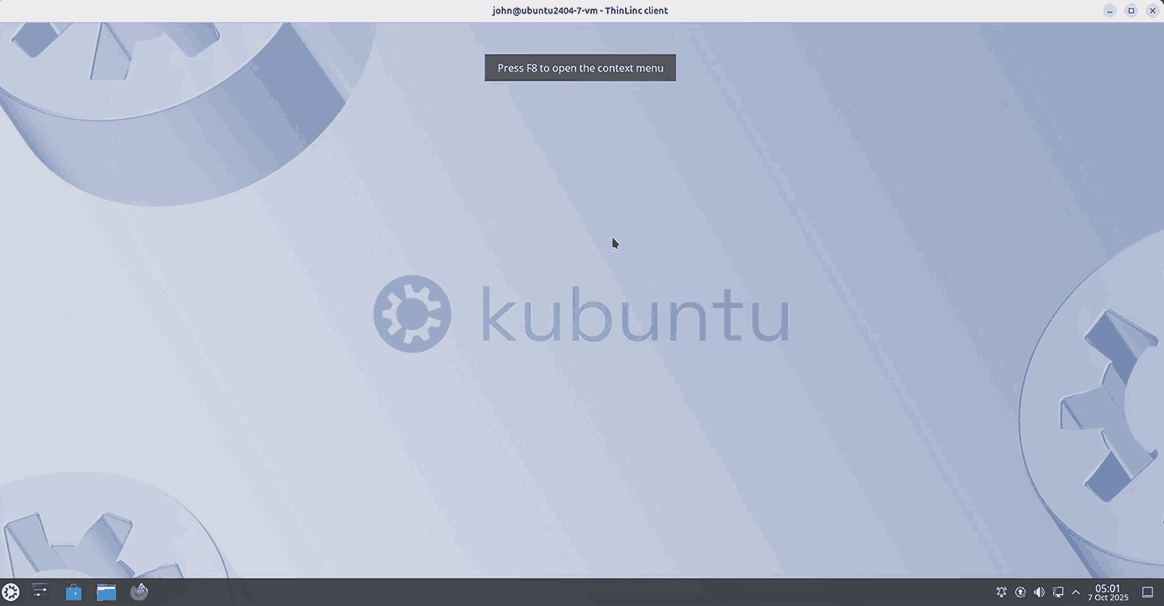
Log in using the user john and the password you set earlier. You will see your Kubuntu desktop running inside ThinLinc’s web interface.

Step 15 – Install and Use the ThinLinc Client
For a smoother experience, you can install the ThinLinc client locally. Go to the ThinLinc client download page and download it on your local machine.
Once the download is completed, please install it using the command below.
sudo apt install ./thinlinc-client_4.19.0-4005_amd64.deb
Then, launch the ThinLinc client from the Ubuntu Dash Application menu.

You’ll see a connection window prompting. Enter the following details.
-
Server – your ThinLinc instance IP.
-
Username – john (or another created user).
-
Key – Specify the SSH key path
Then, click Connect. After successful login, the client opens a full Ubuntu desktop session.
Step 16 - Access the ThinLinc Admin Panel
To manage users, sessions, and system health, open https://your-instance-ip:1010.

Log in with your admin credentials to access ThinLinc’s web-based management dashboard.

Conclusion
You have now deployed a complete ThinLinc VDI environment on Google Cloud using Ubuntu 24.04. The setup allows you to securely access a graphical Linux desktop from any browser or ThinLinc client, giving you a full-featured, multi-user remote desktop solution in the cloud.
This configuration offers a fast and efficient way to deliver Linux desktops to developers, students, or enterprise teams without maintaining physical hardware. By running ThinLinc on GCP, you benefit from Google’s robust network, easy scalability, and simplified management through a single administrative console.
